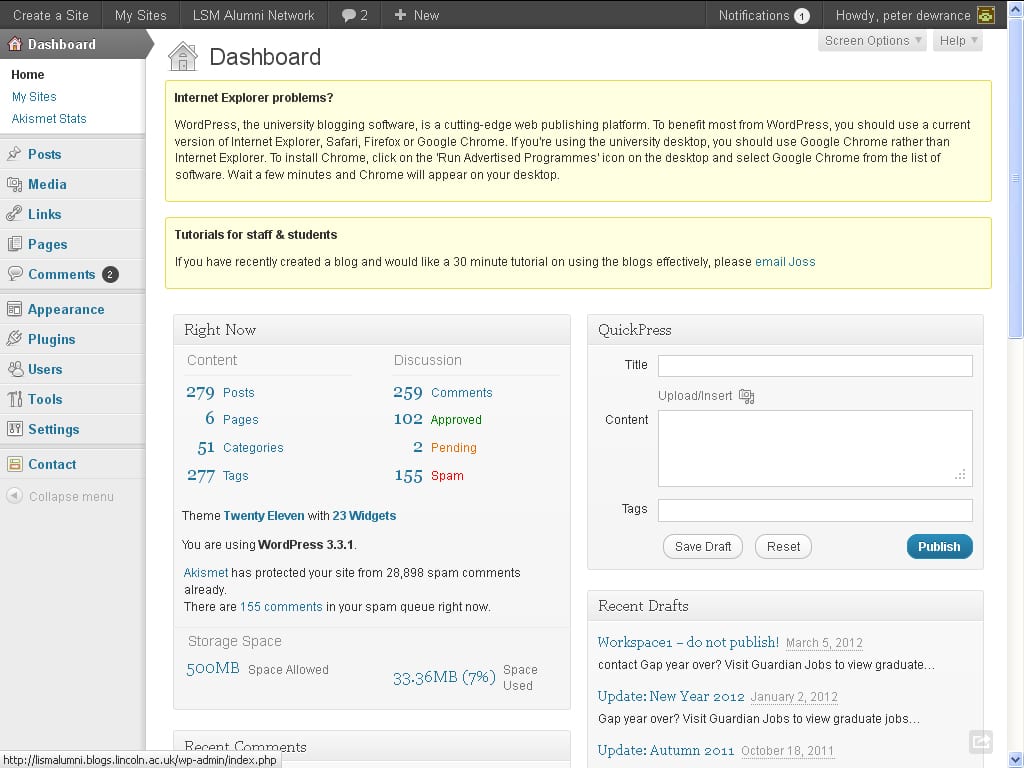
 The Dashboard is the screen you first see when you log in to your WordPress website. It provides an overview of your website, which you can customise to show more or less information.
The features on your dashboard depend first of all on your role. Authors see less than editors, editors see less tham administrators. Here is what I see when I log on to the LSM Alumni Blog as administrator:
Down the left-hand side of the main content area, you’ll see a list of WordPress ‘panels’. These provide all the functionality you require to set up, design and run your website.
On the top left, there is a menu which includes the title of your blog. If you hover over this, you see a shortcut to your blog home page.
On the top right of the Dashboard (and every WordPress admin page) are links to ‘Screen Options’ and ‘Help’.
If you click the Screen Options link, you’ll be able to choose which elements on the screen are displayed and which are hidden.
Each admin page has its own Screen Options, so if you’re looking for a feature that you once used but can no longer find, it’s worth checking the Screen Options for the page you’re on to make sure you haven’t accidentally hidden the feature. It’s a trap for new players!
The Help link is also displayed on every admin page. Explore it!
It’s worth spending some time getting used to the Dashboard. Don’t be overwhelmed by it. It’s well laid out and you’ll learn how to use it as you go along. Feel free to navigate around it by clicking on any of the panel links. You can always get back to the Dashboard by clicking on the Dashboard link at the top-left of the screen.


